Although programs that provide video calls aren't technically streaming services, you can share your OBS Studio-based content in video calls.
The following guide uses Discord as an example. However, you can also apply these steps to Zoom, Teams, Skype, and similar video call programs.
Instructions
Download and install a virtual audio device. This tutorial will assume the use of VB-Cable
Windows:
Note: if you already use a virtual audio device for capturing desktop audio, you must install an additional, separate virtual audio device for this guide. For example, if you already use VB-Cable, try using VAC Lite for this guide
Note: if you already use a virtual audio device for capturing desktop audio, you must install an additional, separate virtual audio device for this guide. For example, if you already use VB-Cable, try using BlackHole for this guide
Note: if you already use a version of BlackHole (i.e. 16ch) for capturing desktop audio, install the other version (i.e. 2ch) for this guide
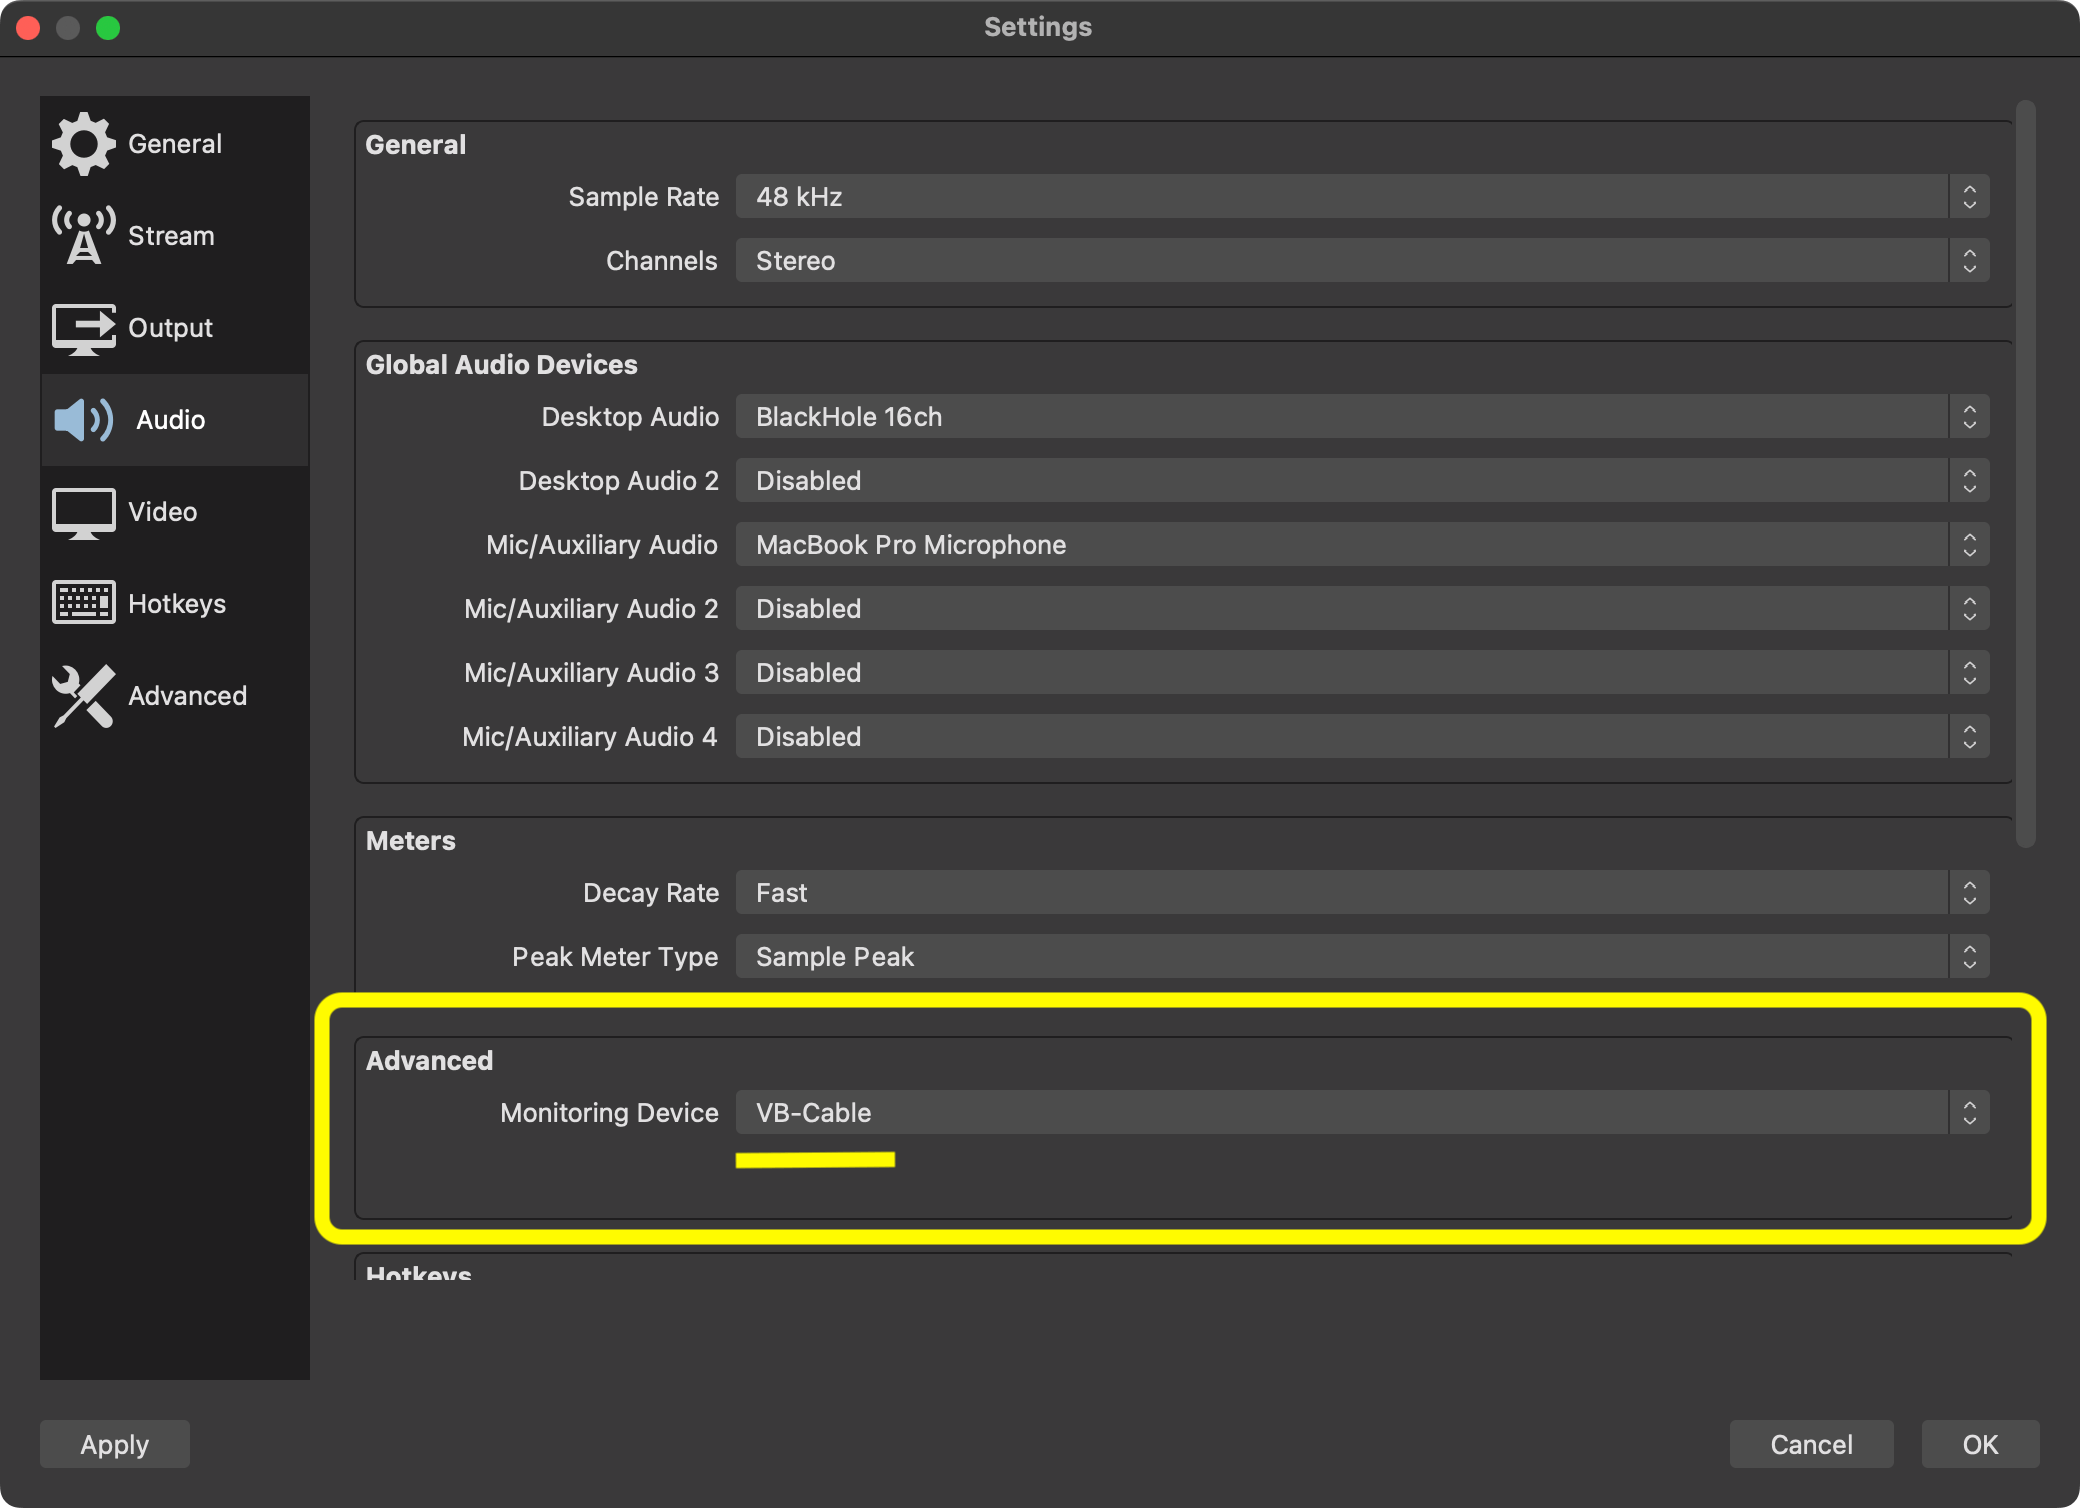
In OBS Studio's Settings window, navigate to the Audio section and set the Monitoring Device to CABLE Input
Windows: CABLE Input (VB-Audio Virtual Device)
macOS: VB-Cable
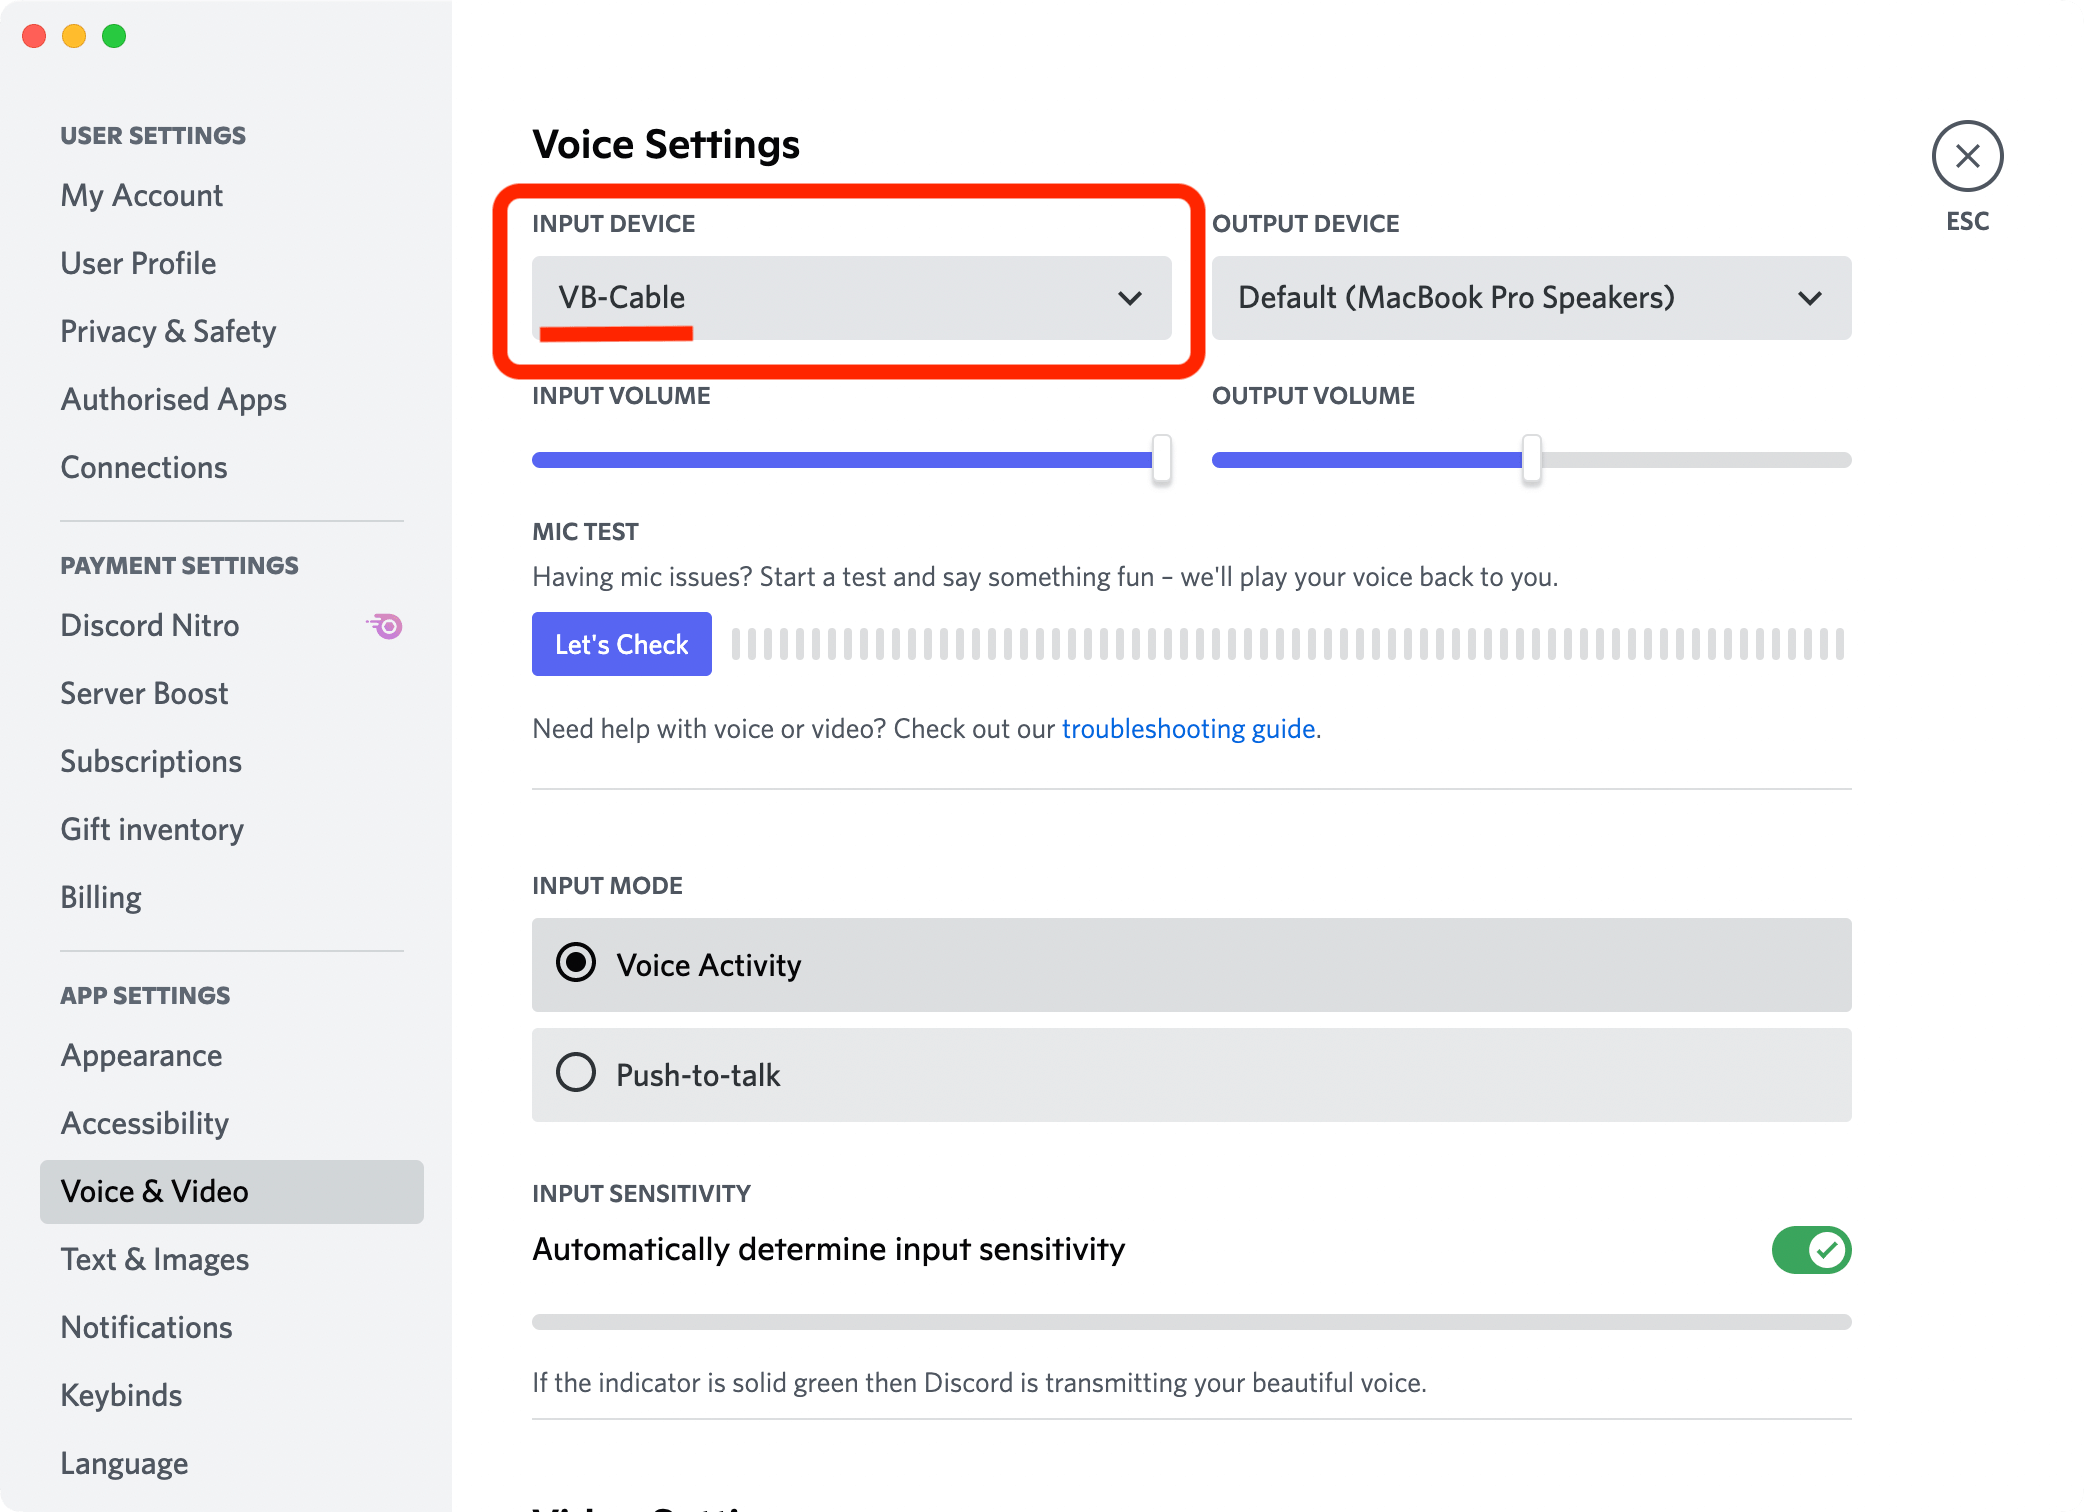
In your video call program's settings, set the Input Device (for audio) to the device you selected in step 2
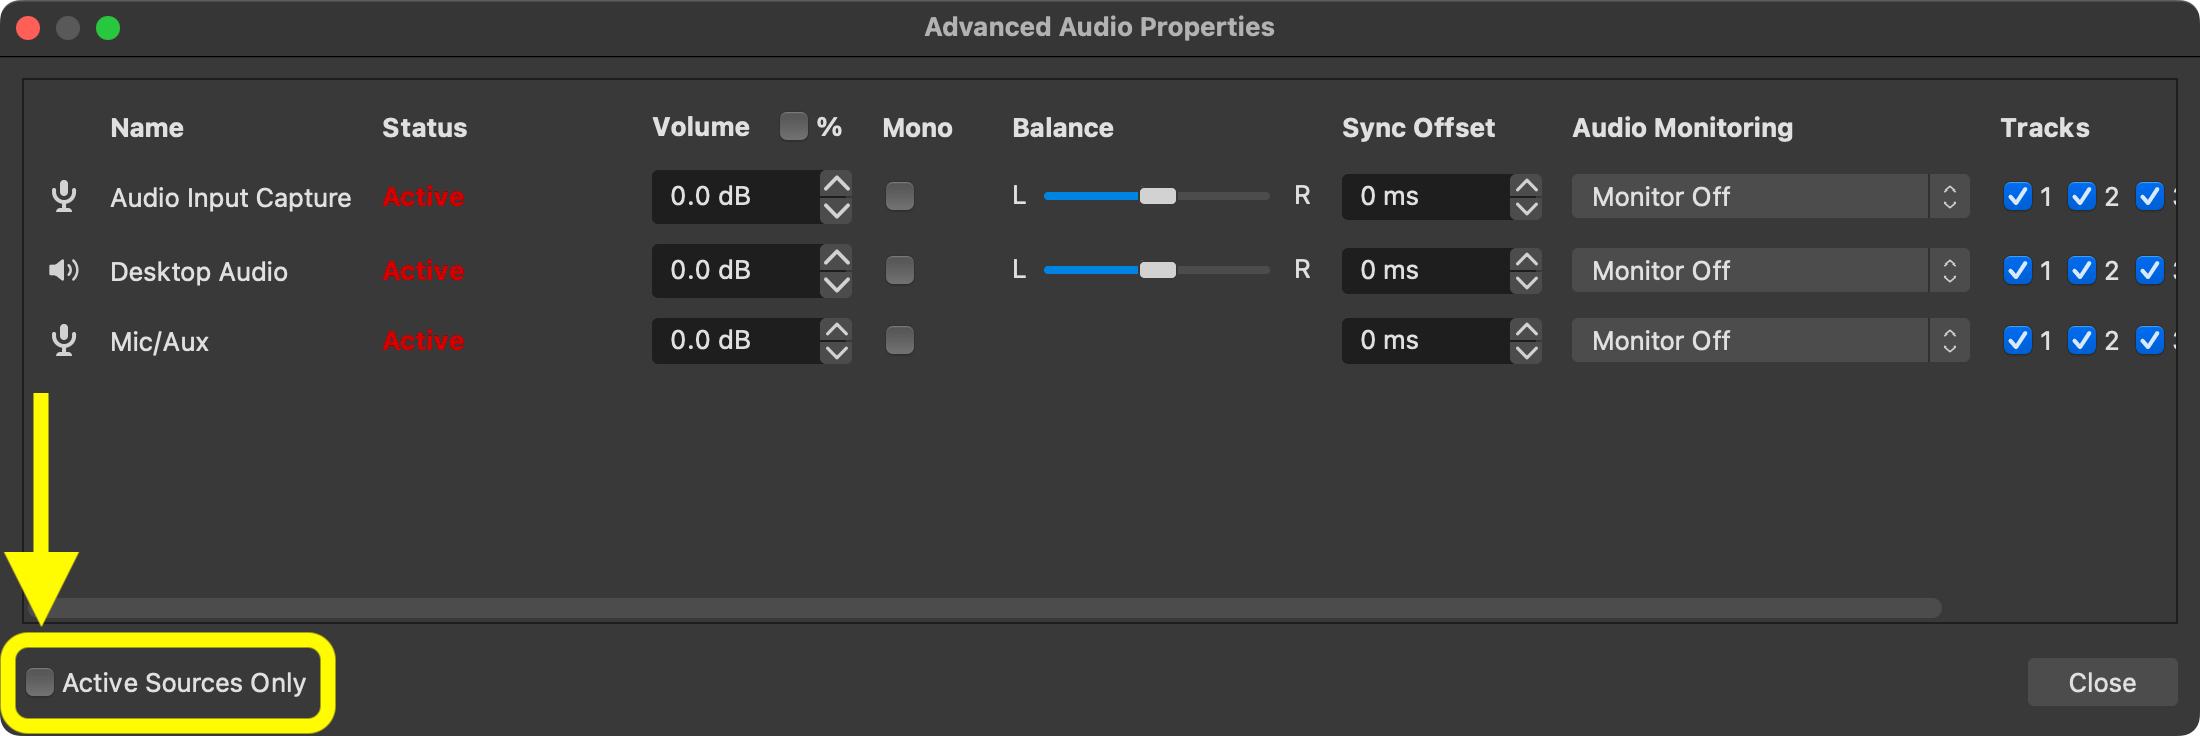
In OBS Studio's main window, click on the Edit menu → Advanced Audio Properties. Uncheck the Active Sources Only checkbox at the lower left of the window.
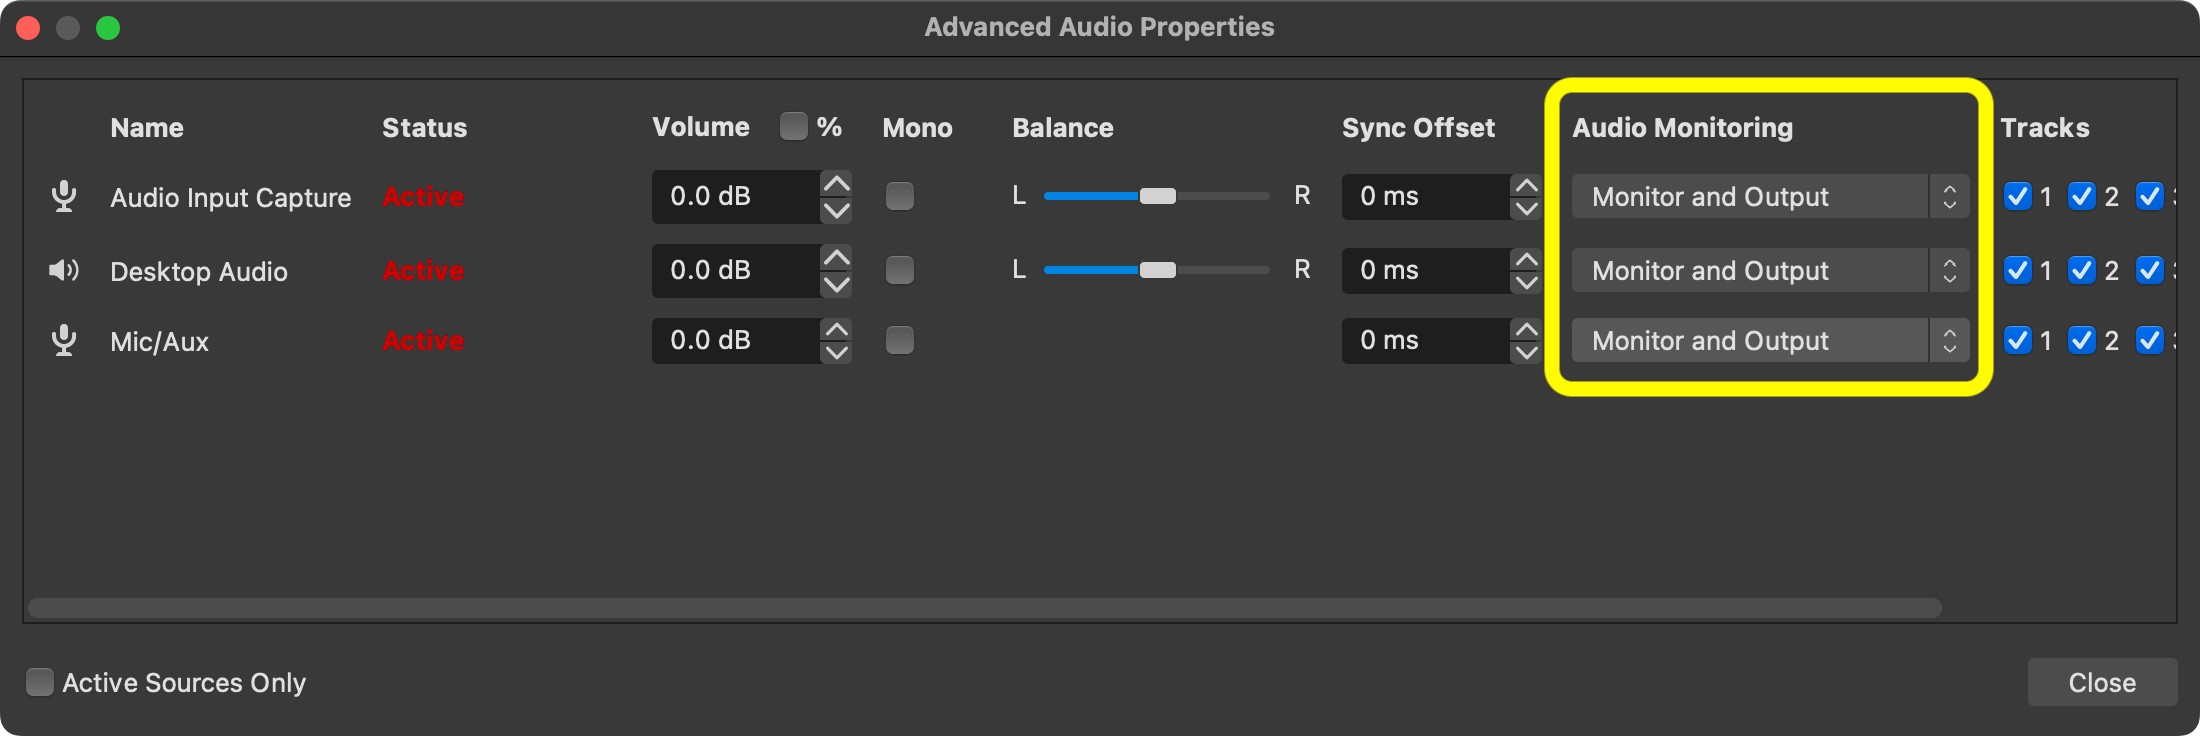
For each audio source that you wish to be heard in your video call, change the Audio Monitoring setting to Monitor and Output.
To make a source only audible in your video call, but muted in your stream/recording, use Monitor Only (mute output instead.
Otherwise, for sources that should be audible only in your stream/recording, and muted in your video call, use Monitor Off
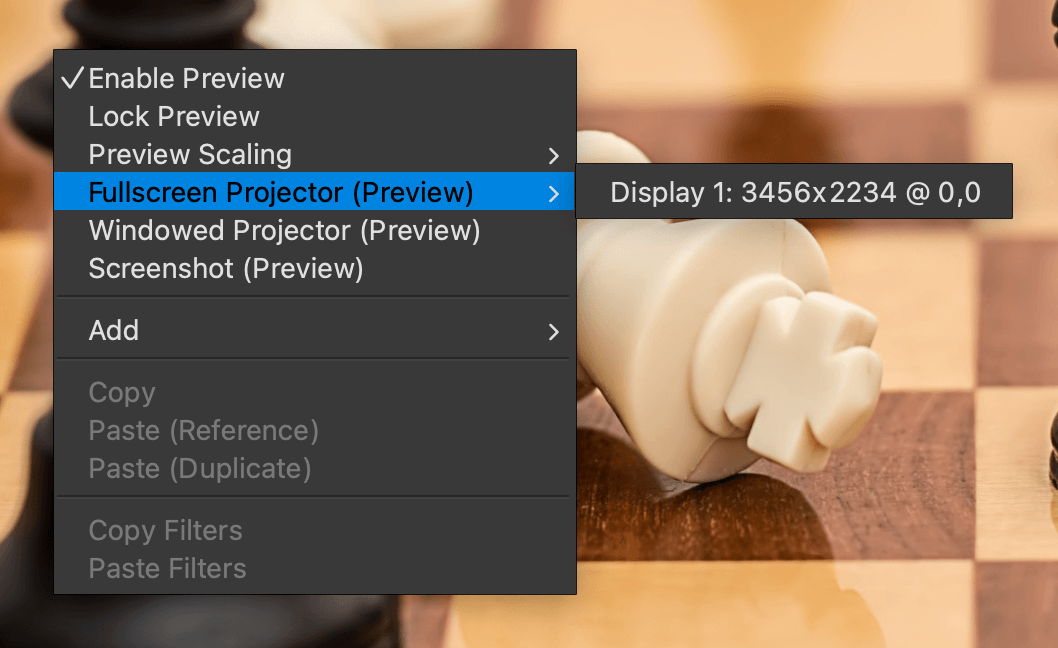
In OBS Studio's main window, right-click on the preview area → Fullscreen Projector (Preview) → choose any display. You can use Alt-Tab to return to OBS Studio or your video call program
If you cannot use a Fullscreen Projector, use a Windowed projector instead. Note: the windowed projector's title bar will show up in the video call
On macOS, if you have a single monitor (i.e. the built-in display on a MacBook or iMac, or one monitor connected to a Mac mini, Mac Studio, or Mac Pro) you should always use a Windowed Projector
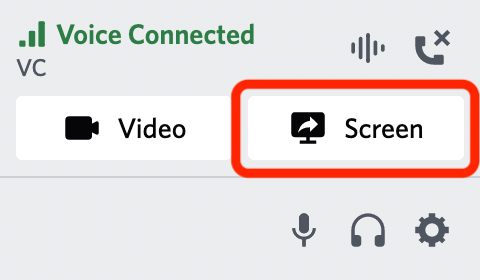
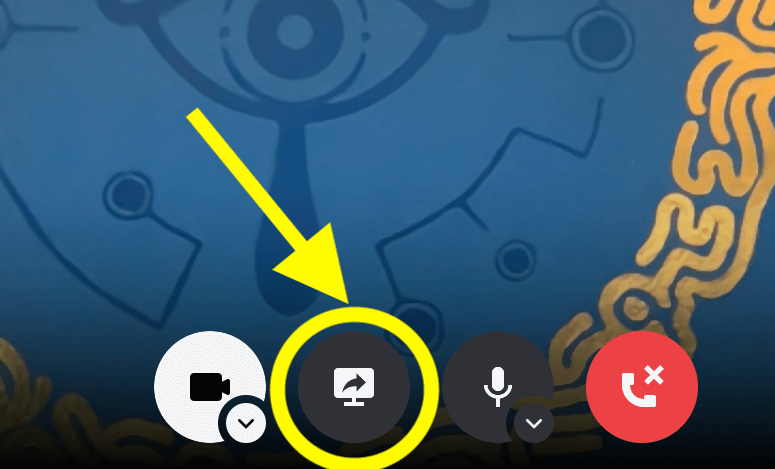
Start a video call and share your screen. For example, if you use Discord, click on the Screen button (voice channels) or Share Screen button (direct calls)
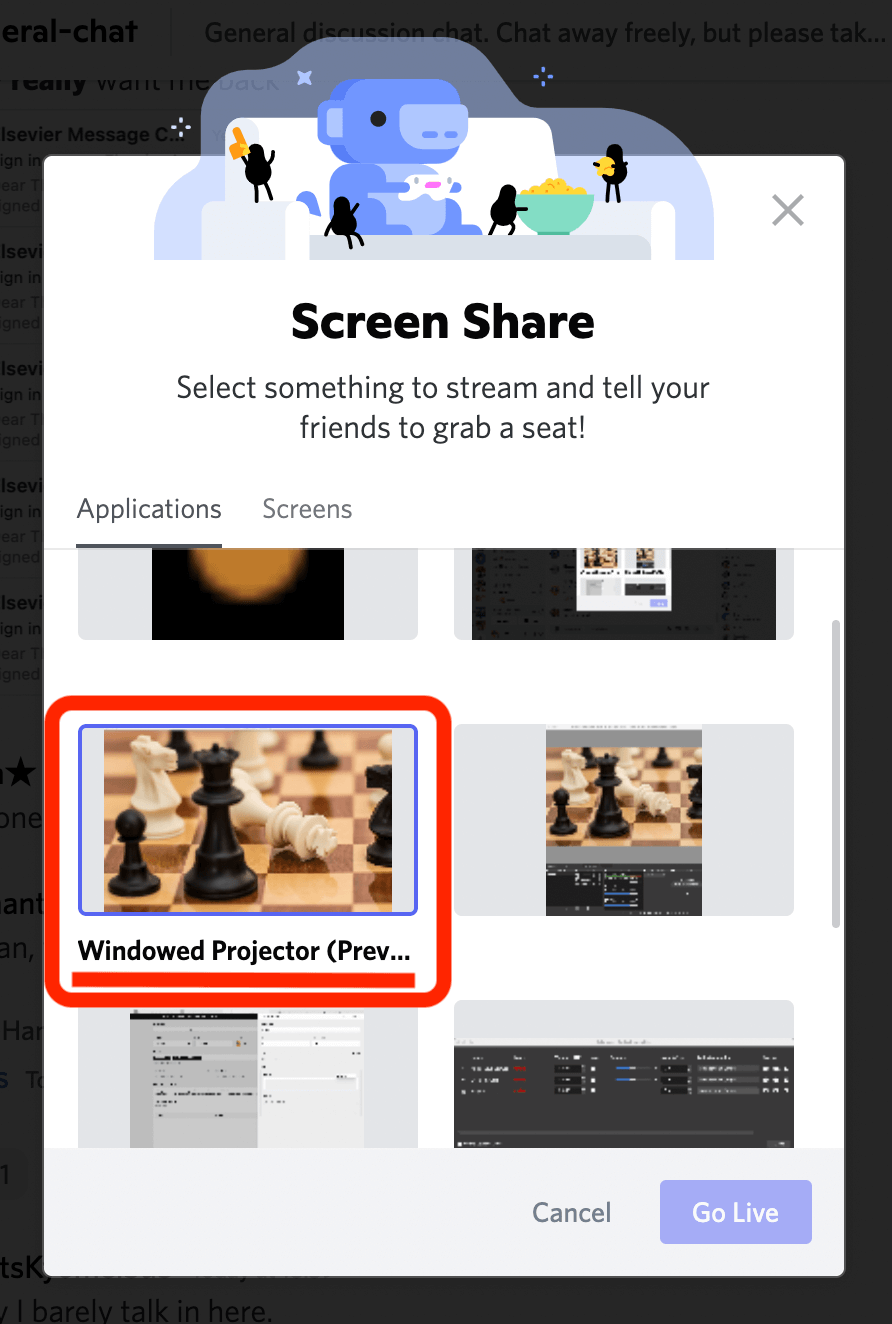
Choose the Fullscreen or Windowed Projector from the list of windows, or share the secondary display where you Fullscreen Projector is showing
That's it! By following these steps, you have made OBS Studio's video and audio available to Discord. You may continue to stream or record as per normal.
Troubleshooting
No microphone audio
Make sure that you have added your microphone as an audio source in OBS Studio. Your microphone audio in OBS will be transferred to the video call program via the virtual audio cable.
Alternatively, you can switch your video call program's input device back to the microphone. However, people in the call will no longer be able to hear the game.