Aspect Ratio Guide
Summary
For best results, it is recommended that you produce your content at a 16:9 resolution such as 1920x1080 or 1280x720.
If you don't have a 16:9 monitor, or your content is not in a 16:9 resolution, it is recommended that you fill the "black space" with other content, such as images, overlays, cameras etc.
Read on for an explanation of what aspect ratio is and how to take it into account when producing video content for a wide variety of viewers.
Picking the aspect ratio
What is aspect ratio?
Aspect ratio is a number used to describe the relationship between an image's width and height. This number is expressed as a ratio in the form of X:Y.
For example, if an image has a resolution of 640x480 (640 pixels wide and 480 pixels tall), that means for every 4 pixels wide the image is, the image is also 3 pixels tall. Therefore, the image's aspect ratio is expressed as 4:3.
An image with a 1:1 aspect ratio is a perfect square, because for every 1 pixel wide the image is, it is also 1 pixel tall.
The most common aspect ratio found on computer displays is 16:9. Example resolutions that have a 16:9 aspect ratio are 1920x1080 (aka "1080p"), 1280x720 (aka "720p"), and 3840x2160 (aka "4K").
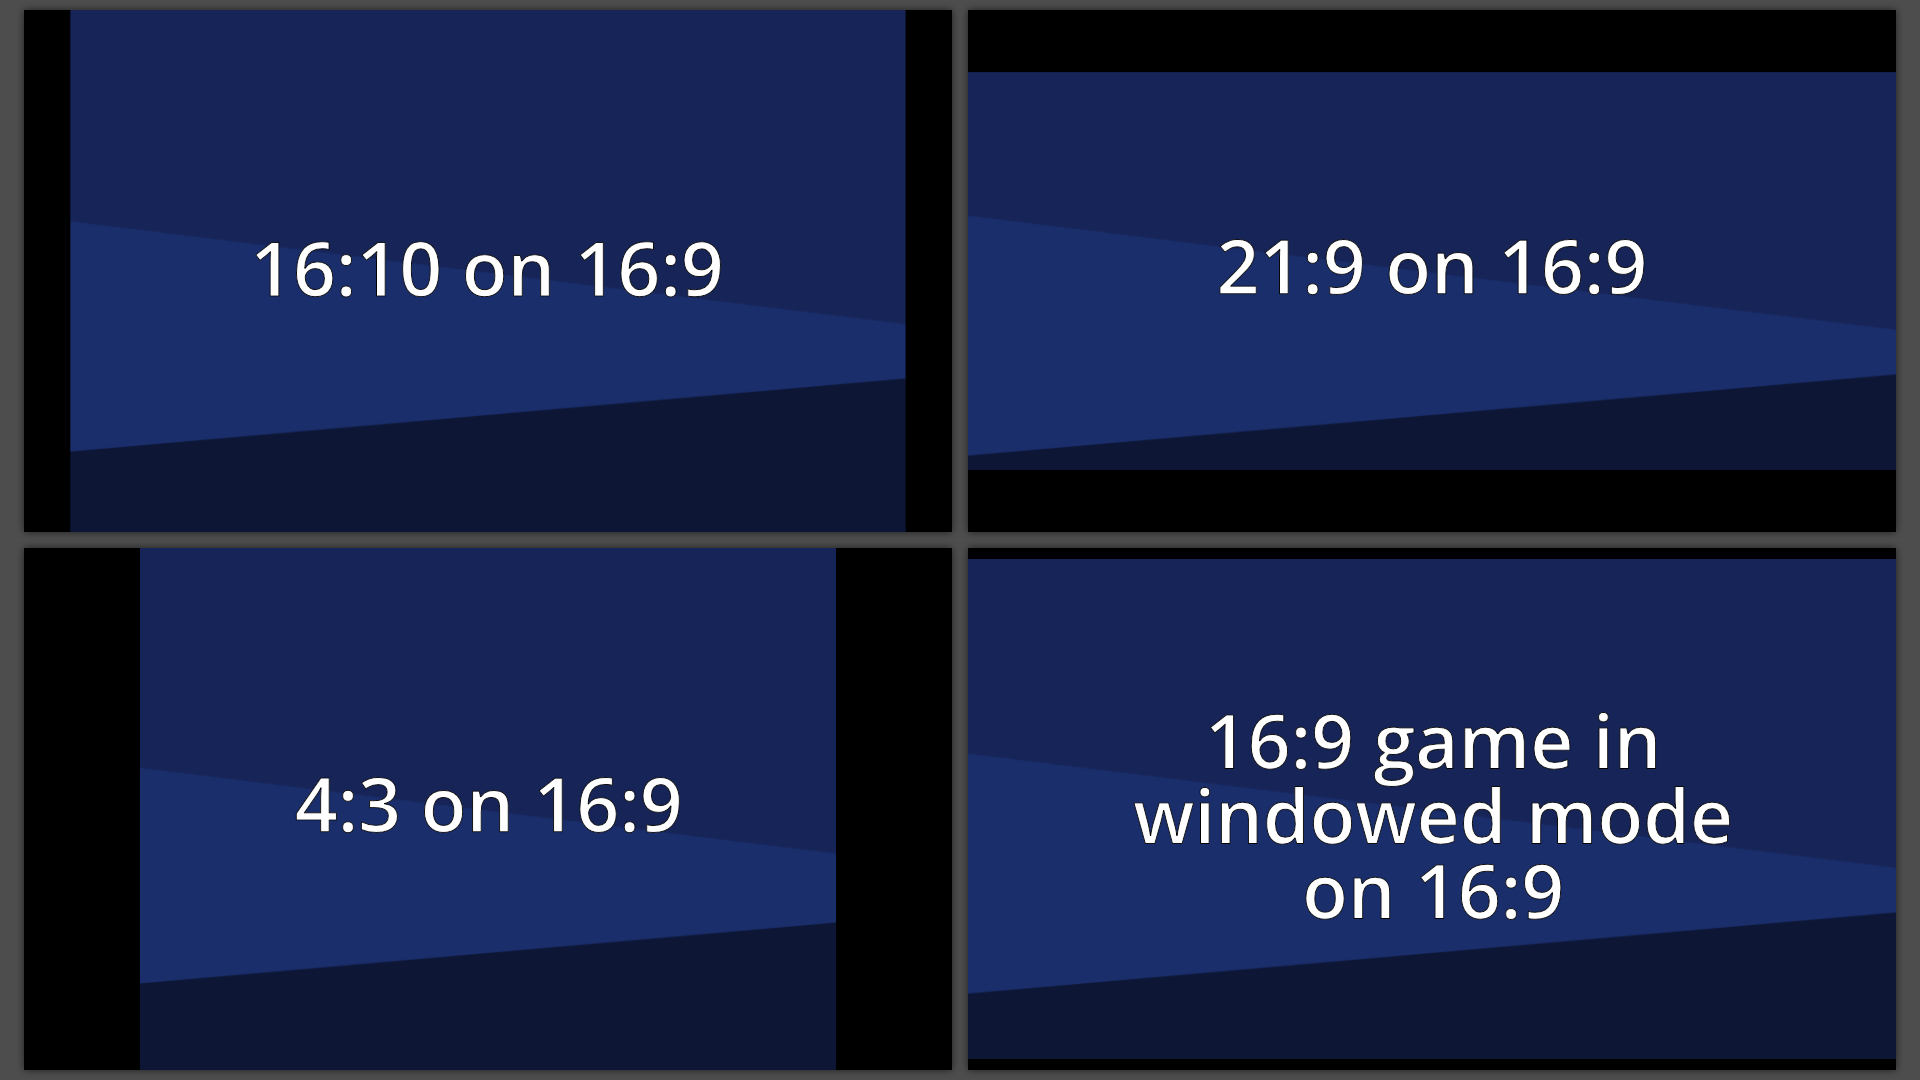
This illustration shows how the different aspect ratios would look like on a 16:9 monitor.
What should you target?
As we mentioned above, the most common aspect ratio for viewing devices is still 16:9. This is what a lot of the big streaming and content platforms expect, like Twitch, YouTube etc.
There are still completely valid reasons for not doing so, for instance to reduce scaling operations (hurts quality), or if you are targeting a specific platform that is optimized for other aspect ratios.
Adapting content
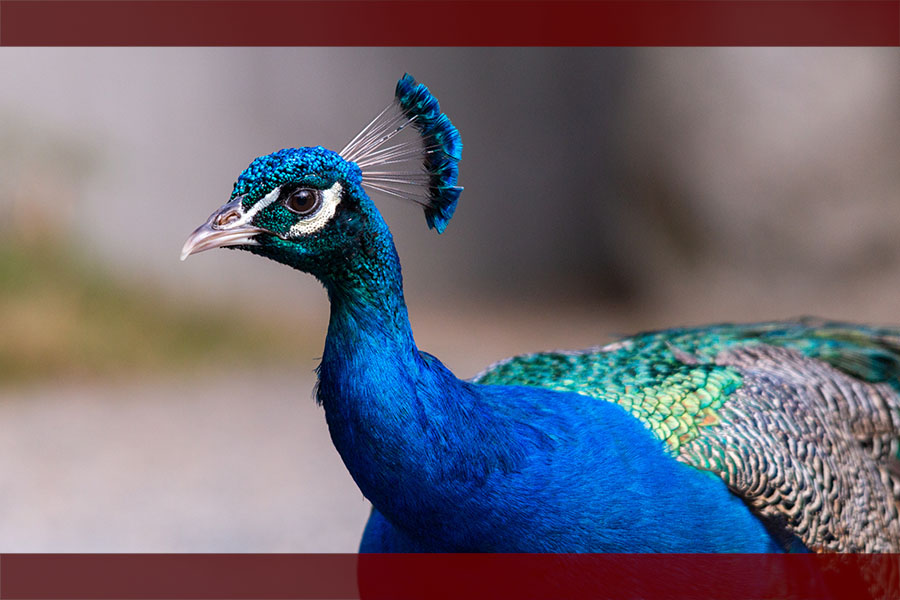
You may have sources, or content that doesn't fit into your preferred aspect ratio, leading to black bars. You have the option of "stretching" the content to fit, but this will warp and distort the source/image, and is generally not recommended.
A different method would be to scale the source larger, so that some of the content/image falls outside of the preview/canvas. That will mean losing some of the "source", for instance the top and bottom (pan and scan).
Building scenes around specific content
If you play retro games, older consoles, or have content that does not fit neatly into the the 16:9 aspect ratio, then you can get a little bit creative with your scene setup.
Older console (example)
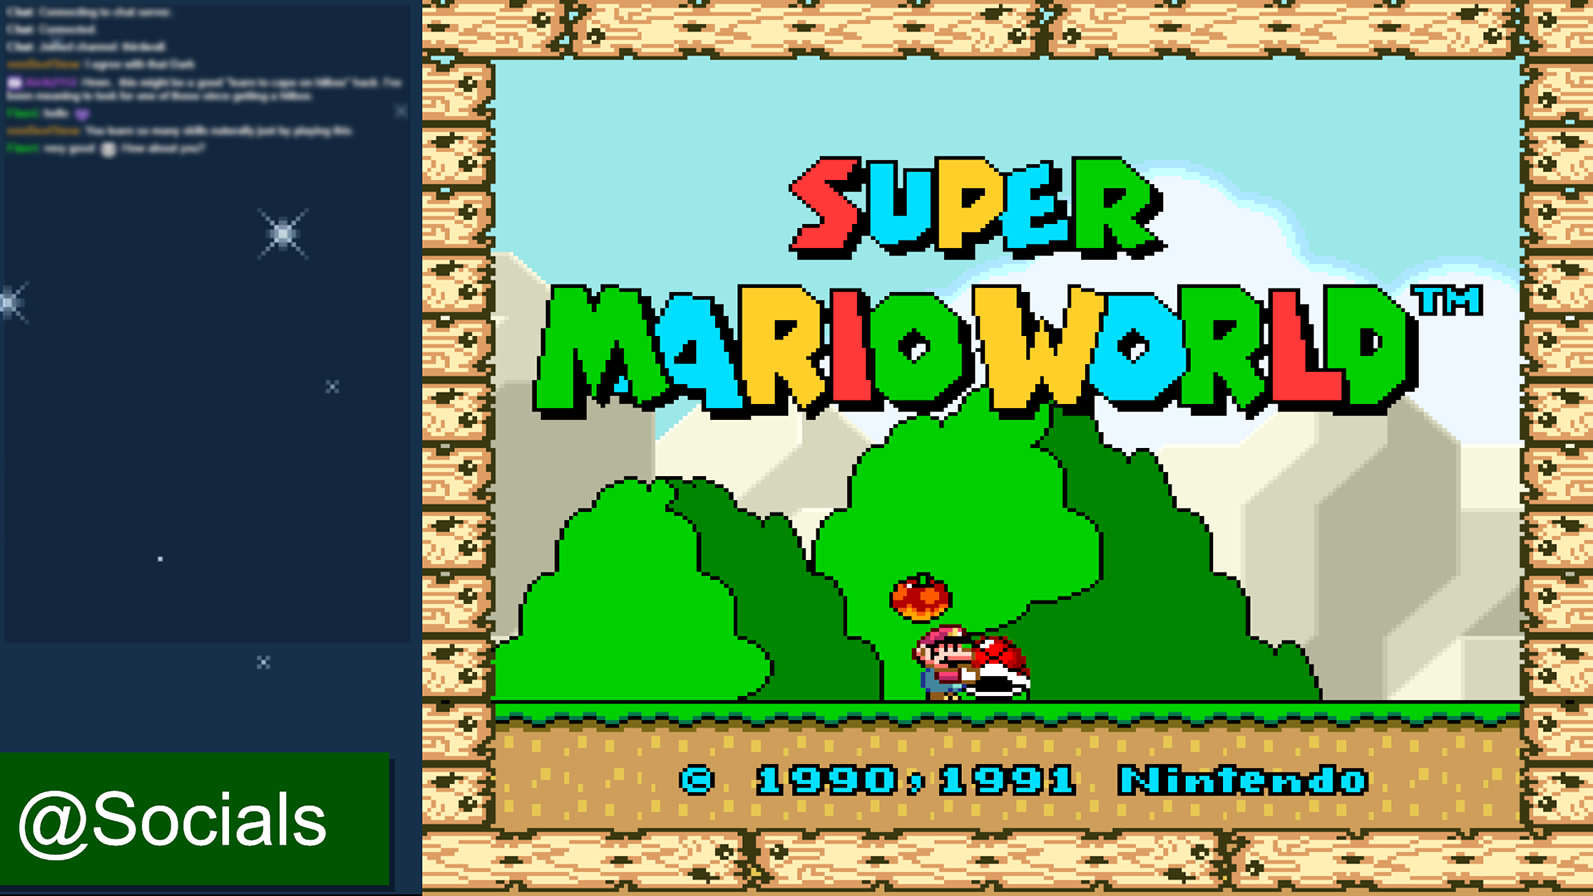
Here we have a Snes scene, where the game does not conform to 16:9. We've chosen to carefully scale the game in order to maintain the sharpness, aspect ratio, and maintain the whole source. We've added chat, socials, and some background elements to fill out the frame.
Scaling, cropping, stretching and filtering
There are several tools you may need to use in order to make sources fit the way you want.
Scaling
The easiest way to scale is to just drag the red squares at the edges of your source. Make sure you have it selected first.
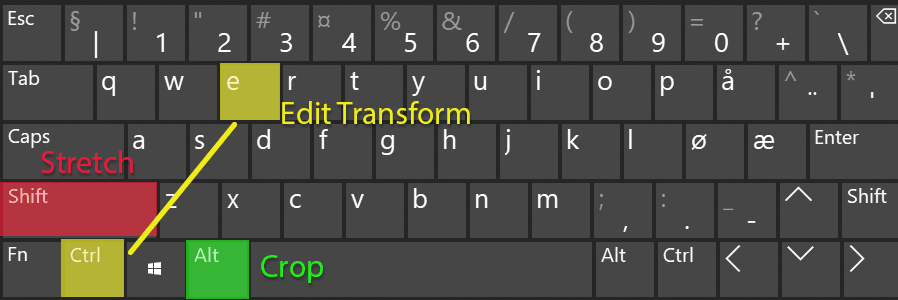
Certain sources will be extra sensitive to scaling, like pixel art, or older/retro sources, and it will be beneficial to try scaling with whole numbers (integers), like doubling or halving the size the original size. This is done by going into the "edit transform" menu Ctrl+E, and doubling/halving values.
This is to try to maintain sharpness. Scale filtering may also be of use, read below.
Cropping
Much like above, you can use the red squares, but you need to hold down the Alt key on your keyboard.
Cropped edges will turn green. Precise cropping can also be done in the "Edit Transform" Ctrl+E menu.
Stretching
This is probably the least preferable way to make content fit, and is rarely advisable. It will most likely end up looking like a blurry and malformed mess. Keep this warning in mind if you do decide to use it.
You can still drag the red dots of the source, but you need to hold down the Shift key on your keyboard.
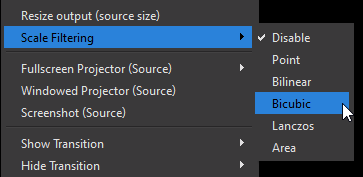
Scale Filtering (source)
Certain scaling "options" work better for different kinds of sources. You can access these by right clicking the source -> scale filtering.
If you find your source looks blurry/soft, try changing it to bicubic for instance. Retro and pixel art can use "point" or "area" to maintain the original sharp look.